Step 1: Create a new Page or Post, (or edit an existing Page or Post). Once you have the editor open, continue to step 2.
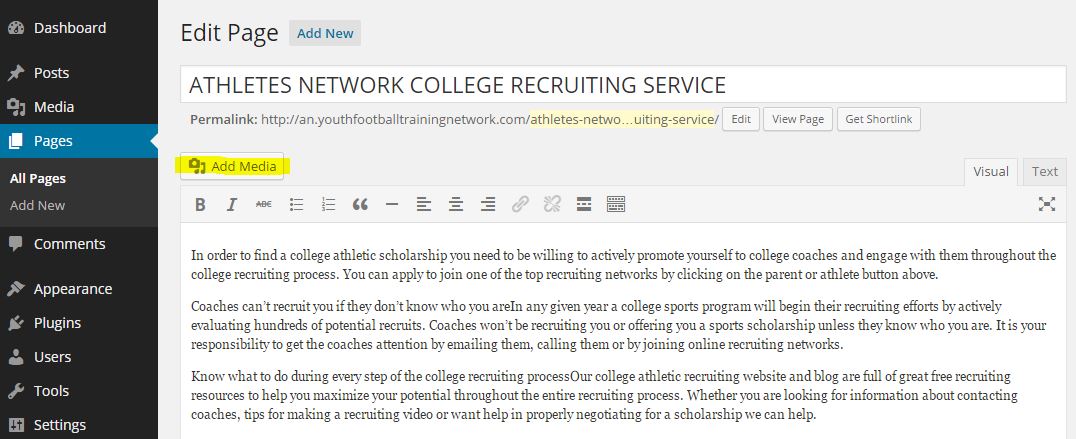
Step 2: Click the ADD MEDIA button, located just above the editor. This will open the Photo Uploader.
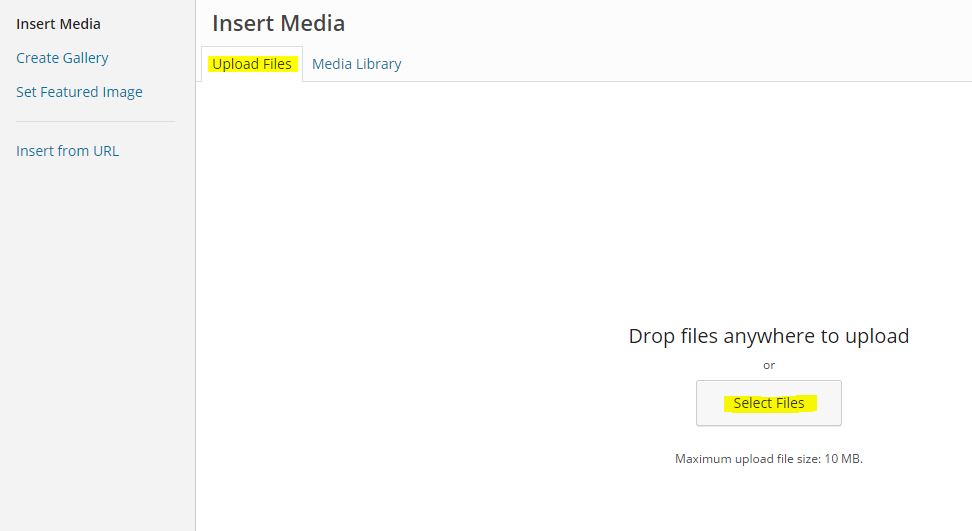
Step 3: Click the SELECT FILES button to choose a photo from your computer to upload to your site.
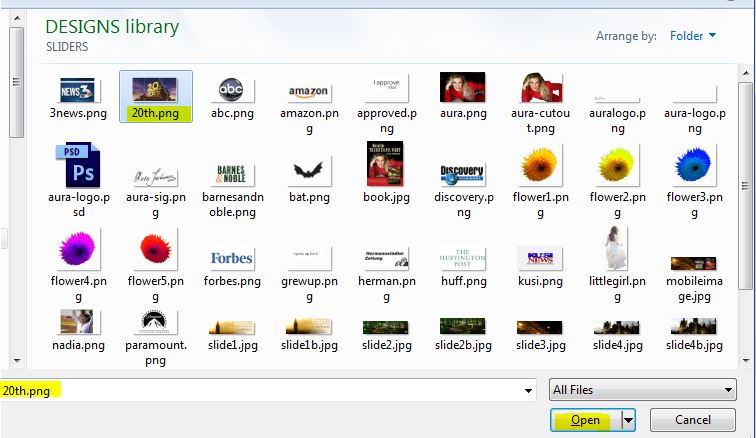
Step 4: Select the file you want to upload and click OPEN.
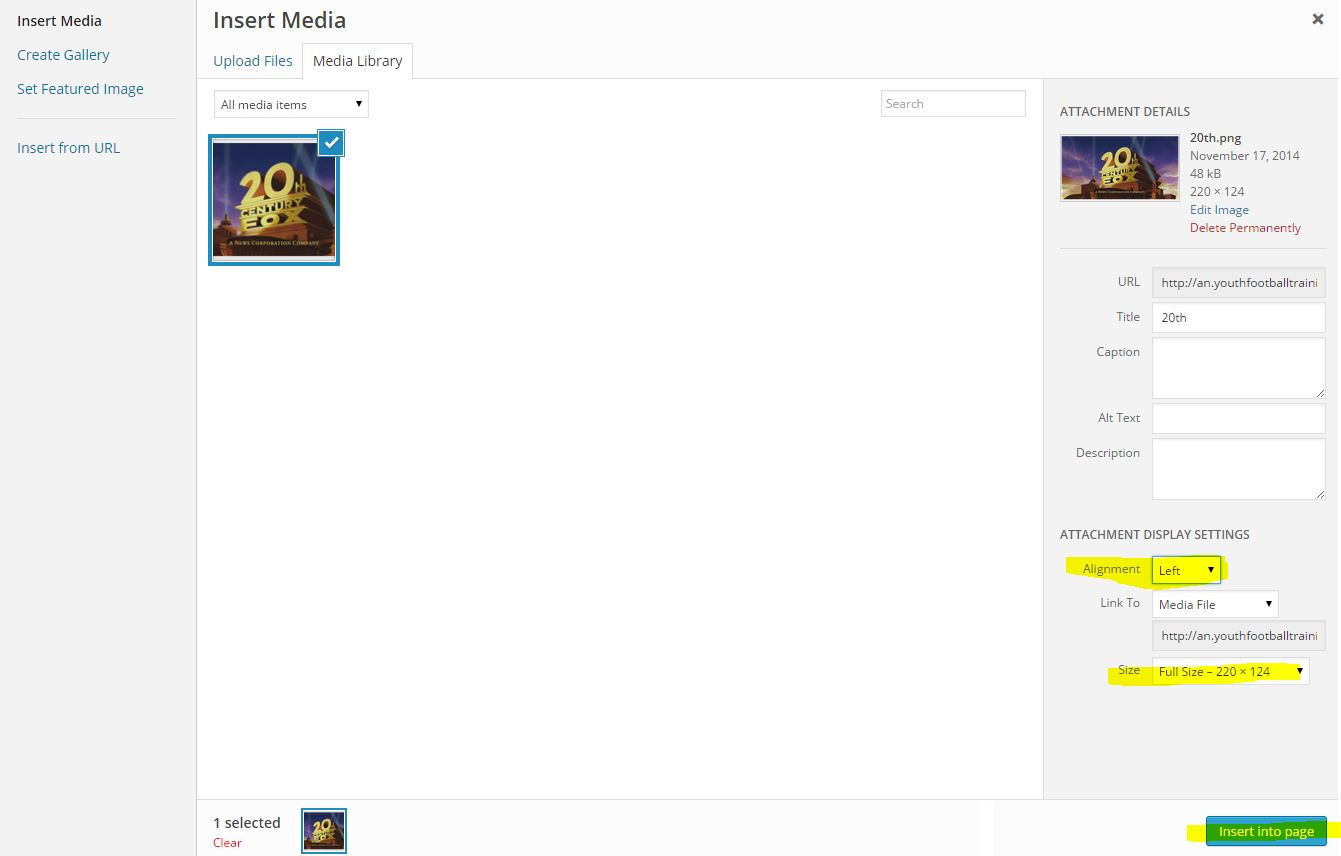
Step 5: Choose Photo Alignment (left, center, right, or none) - this will position your photo within the surrounding text. Select a size (full size, or thumbnail). Then click the INSERT INTO PAGE button.
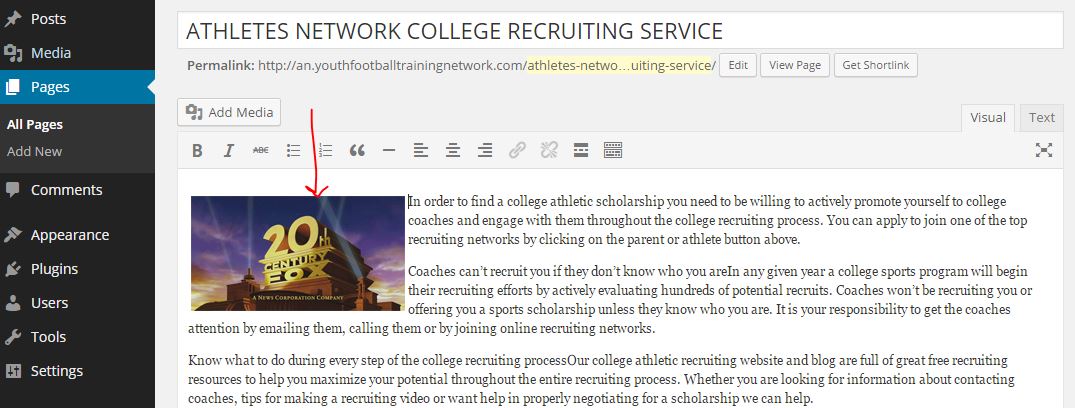
You're done! You should now see your photo inserted into your Page or Post. Don't forget to click UPDATE to save your page when you're finished editing.
March 23, 2021 10 Common Myths About Website Design |
January 27, 2021 Reasons Why Your Company Needs a Website |
January 15, 2021 Top 10 Web Design Trends to Watch in 2021 |
December 29, 2020 How is Artificial Intelligence Transforming the Web Design Field? |
November 25, 2020 Top 7 Web Development Tips You Can’t Afford To Miss |
May 29, 2019 How to Create SEO Friendly URLS with ColdFusion |
November 17, 2014 How to Add a Photo to Your WordPress Site |
August 4, 2014 How to make an Ajax Call to a ColdFusion Component using Jquery |
June 29, 2014 How to Configure IMAP Email on your iPhone |
August 4, 2013 Why use Coldfusion? |
February 24, 2013 Developers rank best application servers |
January 12, 2013 Who's using ColdFusion? |
July 5, 2008 Benefits of a ColdFusion Website |
July 1, 2008 The Power of Coldfusion for your Intranet |
June 29, 2008 Believe the Hype: Coldfusion 8 has arrived |